
Fact: the recommended adhesive for gluing rails to the Central Valley plastic ties is Barge All-Purpose Cement, made by the Quabaug Corporation of North Brookfield, MA. (You mean there's actually an industry in North Brookfield?)
Fact: a 2-oz. tube of Barge cement generally costs less than $5.
But where do you get it?! I always heard of it being available in Ace Hardware stores, but I've been to three Ace locations (two in Massachusetts) and have caught nary a whiff of the stuff. Ace Hardware Outlet wants almost $10 shipping to buy online. Forget it, I'm turning to Amazon!
By the way, I think I now have all of the tie strips, rails and flextrack I need to start laying the track. Unfortunately, I still have to finish building up and carving the foam scenery base first!
Details, details. I'll get to it...one of these days.
Tuesday, December 2, 2008
Saturday, September 27, 2008
Not your typical green thumb...
Today I did a little shopping for more supplies. I'm getting slightly ahead of myself since I have a lot of terrain-carving to do, but I wanted to have the stuff on hand to put down scenic covering when it's ready. One thing I needed was a dirt-colored latex paint to put down initially. Looking at pictures of Palmer during various seasons, any exposed dirt seemed to be a light tan color.
I found out that Sherwin-Williams sells 31-oz sample bottles of almost any interior paint color for $5. They say this is enough paint to cover 75 sq. ft. so you can test it on a wall or whatever, but it's way more than enough for my 20 sq. ft. of layout. They do warn that it's not suitable as a topcoat (although you can clear-coat it) but I don't think this will matter in this case. There's a Sherwin-Williams store right down the street from me, so I picked a color called "Totally Tan" and also chose the darker "Cobble Brown" that I think I'll use to paint the benchwork.
I've already done some experimenting with scenic materials, including static grass flocking. Someone posted a link on the Atlas forum to a set of instructions for rigging up a static grass applicator using the circuitry from an electric fly swatter. Basically it charges a capacitor to high voltages that zap a fly when it touches the metal paddle, but this tool uses a metal strainer to charge the grass as it falls. Since Harbor Freight had them on sale for $3, this seemed worthwhile to try. I used a strainer from Dollar Tree that had a metal handle I could solder to, so it wasn't hard to assemble.
 $3 electric flyswatter + $1 tea strainer = instant static grass tool.
I tried the tool out a while back using Medium Green static grass from Woodland Scenics, and while it didn't exactly make all the fibers stick up straight, there was definitey plenty of texture:
 First attempt at using the static grass tool with Medium Green flocking.
I also noticed the color was too uniform, so this time I tried it again by laying down a coat of the Totally Tan paint and then applying a combination of static grass and ground foam. I used Woodland Scenics fine Weeds foam (a deeper green) to add some darker shading underneath the grass, and sprinked a little bit of Green Grass foam on top for texture. I definitely like this sample a lot more, but it still looks a little too manicured so I'll have to try adding longer pieces of WS field grass and bits of lighter-colored ground foam to look like clover or dandelions.
 Second experiment with more color and texture.
Wednesday, September 24, 2008
Let's talk about foam...
In keeping with the all-foam theme, I made a cool discovery yesterday. I've been planning to use Woodland Scenics foam Track-Bed instead of the traditional cork roadbed, but so far I had only bought the 3/16"-thick, 2"-wide material that they make for HO scale. This comes with a 45-degree beveled shoulder and looks great for mainlines, but for my interchange track and the CV yard trackage, I wanted something with a lower profile. Woodland Scenics does make N scale Track-Bed in 1/8" thickness, but I wasn't sure how wide it was and didn't love the idea of trimming strips from the large sheets they sell. So, that's when I kicked into engineering mode, and here's what I learned...
The Track-Bed appears to be made from a closed-cell polyethylene foam, which is very different from typical open-cell polyurethane foam (think sofa cushions) or extruded polystyrene foam (think wall insulation). One of the more common uses for PE foam is flotation devices, since it's extremely buoyant, and it's also used in packaging for its firmness. I found some suppliers for it in black 1/8" sheets, but not really in the sizes or quantities (i.e. small) that I was looking for. Then I started looking at other uses of foam, and stumbled upon self-adhesive weatherstripping rolls sold in hardware stores. Not many of these were PE foam, but I did see a lot made from closed-cell PVC. I found several sizes (and colors!) that might be suitable for roadbed, and finally hit the jackpot with this pipe-wrap insulation tape from Frost King/Thermwell:
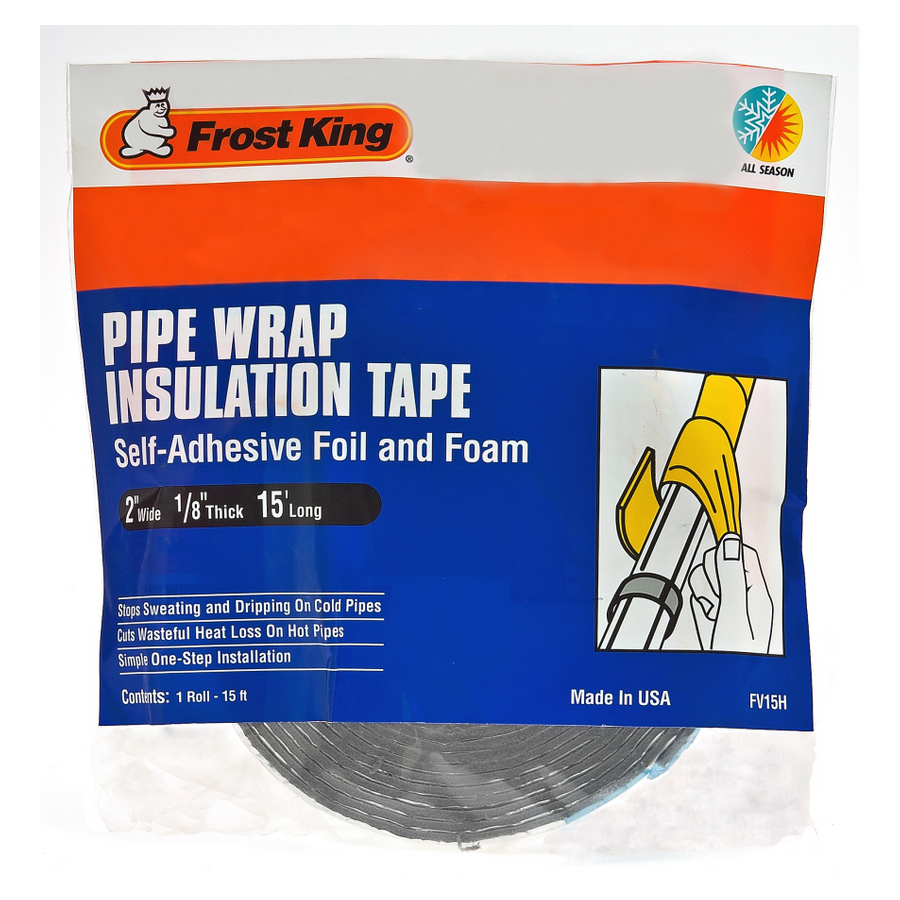 This particular roll is 1/8" thick by 2" wide by 15' long, and comes in a medium gray color with a self-adhesive backing on one side and a layer of aluminum foil on the other side. I was worried about the foil at first, but it turns out they also sell a black 30' roll without the foil. Since I didn't need that much length and didn't want to have wasted money if the foam was unsuitable, I bought the cheaper short roll ($3 at Lowes!) and set about peeling off the foil. Going slow and steady, it actually comes off pretty cleanly, although it tears often and you have to watch the jagged edges. Anyway, with that done (or unnecessary if you buy the longer roll) you get a convenient peel-and-stick roadbed that matches the Track-Bed nicely in width!
 Comparison of the Track-Bed (black) and foam pipe-wrap tape (gray).
I will say that it's noticeably softer/squishier due to the different material, and I haven't found a good way to bevel the edges (hot-wire? Dremel saw blade?). But since I'm using this to represent less-maintained trackage, both of these issues pretty much go away. The softness isn't as apparent with track in place compared to direct fingertip pressure, and these tracks don't need crisply ballasted shoulders so I can just blend them in with putty or acrylic paste. The pressure-sensitive adhesive doesn't seem permanent, instead being more like the foam tape that 3M sells, but I think it'll hold fine (especially after gluing the track down and ballasting). It does have excellent sound-dampening qualities, which is important because extruded foam actually tends to amplify noises if track is laid directly on it.
By the way, I also bought some sheets of 'craft foam' at Jo-Ann that comes in various colors and thicknesses (2mm, 3mm, 6mm). This is a denser foam (neoprene, I think) that seems identical to what Atlas uses for protecting the handrails of their HO diesels. I plan on using strips of the 2mm to shim my roadbed up to meet the Track-Bed, and the other sizes could make nice level foundations for structures. It may have other scenic uses as well, since the black and gray colors do resemble asphalt and concrete, but I'm not sure how well it takes paint.
One more thing - check out this tool I made for marking the outside edges of where the roadbed should go, since the centerline won't be visible:
 4 types of foam: expanded polystyrene beadboard (white); extruded polystyrene insulation (pink); closed-cell polyethylene track-bed (black); closed-cell PVC pipe-wrap (gray).
Wow, when did I become this obsessed with foam anyway?
The Track-Bed appears to be made from a closed-cell polyethylene foam, which is very different from typical open-cell polyurethane foam (think sofa cushions) or extruded polystyrene foam (think wall insulation). One of the more common uses for PE foam is flotation devices, since it's extremely buoyant, and it's also used in packaging for its firmness. I found some suppliers for it in black 1/8" sheets, but not really in the sizes or quantities (i.e. small) that I was looking for. Then I started looking at other uses of foam, and stumbled upon self-adhesive weatherstripping rolls sold in hardware stores. Not many of these were PE foam, but I did see a lot made from closed-cell PVC. I found several sizes (and colors!) that might be suitable for roadbed, and finally hit the jackpot with this pipe-wrap insulation tape from Frost King/Thermwell:
This particular roll is 1/8" thick by 2" wide by 15' long, and comes in a medium gray color with a self-adhesive backing on one side and a layer of aluminum foil on the other side. I was worried about the foil at first, but it turns out they also sell a black 30' roll without the foil. Since I didn't need that much length and didn't want to have wasted money if the foam was unsuitable, I bought the cheaper short roll ($3 at Lowes!) and set about peeling off the foil. Going slow and steady, it actually comes off pretty cleanly, although it tears often and you have to watch the jagged edges. Anyway, with that done (or unnecessary if you buy the longer roll) you get a convenient peel-and-stick roadbed that matches the Track-Bed nicely in width! Comparison of the Track-Bed (black) and foam pipe-wrap tape (gray).
I will say that it's noticeably softer/squishier due to the different material, and I haven't found a good way to bevel the edges (hot-wire? Dremel saw blade?). But since I'm using this to represent less-maintained trackage, both of these issues pretty much go away. The softness isn't as apparent with track in place compared to direct fingertip pressure, and these tracks don't need crisply ballasted shoulders so I can just blend them in with putty or acrylic paste. The pressure-sensitive adhesive doesn't seem permanent, instead being more like the foam tape that 3M sells, but I think it'll hold fine (especially after gluing the track down and ballasting). It does have excellent sound-dampening qualities, which is important because extruded foam actually tends to amplify noises if track is laid directly on it.
By the way, I also bought some sheets of 'craft foam' at Jo-Ann that comes in various colors and thicknesses (2mm, 3mm, 6mm). This is a denser foam (neoprene, I think) that seems identical to what Atlas uses for protecting the handrails of their HO diesels. I plan on using strips of the 2mm to shim my roadbed up to meet the Track-Bed, and the other sizes could make nice level foundations for structures. It may have other scenic uses as well, since the black and gray colors do resemble asphalt and concrete, but I'm not sure how well it takes paint.
One more thing - check out this tool I made for marking the outside edges of where the roadbed should go, since the centerline won't be visible:
 4 types of foam: expanded polystyrene beadboard (white); extruded polystyrene insulation (pink); closed-cell polyethylene track-bed (black); closed-cell PVC pipe-wrap (gray).
Wow, when did I become this obsessed with foam anyway?
Tuesday, September 23, 2008
Just what I need, another new project...
Well, actually, it's not really a very new project. I first started officially planning it a little over a year ago (then found out shortly thereafter that my friend Tom had the exact same idea in mind). It all stems from wanting to build a layout to run my models, wanting a nice diorama to photograph my models on, wanting to practice my scenery techniques, and the key to it all: having some space along a nice long wall in the living room of my apartment.
So what exactly is this project? Basically, it's an HO modular layout representing the diamond at Palmer, Massachusetts, where two rail lines cross and at least four different railroads are represented. In my chosen early-'90s era, speficially 1993, those two lines were Conrail's Boston Line and the Central Vermont mainline. Amtrak and the Masachusetts Central also make appearances, with the MCER serving the Boston Line interchange, but nowadays CR and the CV have given way to CSX and the New England Central.
The layout itself is 2'x10' in the form of two 2'x5' modules. Both have simple box frames made from 1x4 pine, but my goal is to build all the scenery from foam and other lightweight materials. This is partly to keep costs down, partly to try out the latest innovative scenery techniques, and also partly so I can lift the foam sections out to make them more portable for photo shoots.
Now, being the engineer and rivet-counter that I am, I knew I had to plan this as realistically as possible. I started by studying satellite photos and old Conrail track charts to make sure I understood the track layout. I drew a 2'x10' grid in Illustrator and scaled the photo to 1:87 HO, then adjusted it here and there until the scene fit within my borders.
 Scaled-down satellite photo and selectively adjusted track plan.
I loosely traced over the tracks, playing with the curves until I liked them, then jumped over to SolidWorks so I could draw the plan more accurately. I decided to use a #8 switch on the mainline and #6 switches everywhere else, so I drew them in and made sure that all my curves would line up with no kinks. I used the measuring functions in SolidWorks to help me transfer the track centerlines to a full-scale grid that I hung on the wall, pinning up lengths of flexible 1/16" aluminum bar stock from Lowes to form smooth curves.
 This hideous decor was hanging on my wall for several months, but luckily it's gone now.
After putting it off for a while, the project finally got going during a 3-day weekend when I drove up to Home Depot to buy the initial foam slabs. They carry 2'x8' panels of interlocking pink Owens Corning insulation in several thicknesses, so I decided this route would save me some cutting (not to mention be easier to transport). I was a little worried about fitting the panels into my Saab though, so I also bought a small saw in case I had to shorten them so they'd survive the hilly drive back to my apartment. Luckily, with some careful adjustments and a bit of wiggling, I managed to fit both 2"-thick panels intact! Must have looked a little funny to other drivers, though.
 They don't call them "Swedish pickup trucks" for nothing!
As it turns out, the interlocking panel feature means you lose a bit of the nominal 2' width at the edges, which means I might have some filling or shimming to do later. It also turns out that the 4'x8' blue Dupont foam sold at Lowes comes pre-scored so you can easily break it into 16" or 24" widths. Had I realized that, I might have paid the extra $10 or so for the single sheet so I'd have the full edges, not to mention a much shorter awkward drive home...emphasis on 'might,' though.
I did go to Lowes the next day anyway to buy lumber for the box frames. Although they sell a grade called 'select pine' that is cleanly cut and has a very nice finish, I decided that for this eventually-hidden benchwork I'd stick with basic 1x4 pine. For the long sides of my modules, I spent some time picking out two of the straightest and cleanest 10' lengths I could find, then grabbed two more so-so pieces to make the short sides and braces. After a few cuts on the panel saw by a friendly Lowes employee, I had four nominal 5' lengths and ten 22-1/2" pieces.
Starting with the corners, I applied wood glue and clamped them together with a speed square on the inside, then drilled and countersunk holes for two wood screws. After I had the basic box formed, I added the three braces running horizontally (so I'll have flat spaces for mounting things like switch machines, if I decide to use them). A little touch-up with a sanding block and I had two 2'x5' frames that are strong, light, and reasonably neat and square.
 First wooden frame complete. That's the October 1993 MR with an article on the Boston Line.
To attach the two frames together, I drilled holes for a pair of 3/8"-16 x 2" hex bolts with fender washers and wing nuts. The fender washers distribute the clamping force onto the wood, while the wing nuts make it easy to loosen or tighten these (though a wrench also helps). For now, the modules are sitting on cheap Harbor Freight sawhorses, but eventually I'd like to build legs that raise the layout to a better viewing level. The foam panels are keyed in place with pieces of 3/8" dowel that I drove into holes around the edges of the benchwork. I also decided to make shims from basswood strips as a way of simulating the grade through Palmer, but I can remove these later if I decide I don't like the effect.
The actual subroadbed surface is another sheet of foam, this time 1-1/2" thick, which spans the full width at the eastern end but turns into a pair of embankments west of the crossing. By cutting and fitting some scraps together, I was able to use a single 2'x8' panel, although unfortunately the interlocking edges of this piece were even worse. This did give me an excuse to try some Foam Putty from Woodland Scenics, and I'd say I like it. It's a very lightweight spackle that closely resembles foam when dry...I just wonder if it's actually identical to something cheaper you could get at the hardware store.
 1-1/2" foam subroadbed added. The locos/cars are checking clearance past the switches.
Recently, I really got some momentum going when I found someone selling a bunch of new and used track on eBay. I've been wanting to try the tie strips and switch kits from Central Valley, but I also want to use three rail sizes: code 83 for the CR mainline, code 70 for the passing siding and CV trackage, and code 55 for the interchange track. Not only did this seller have four of the five CVT switch kits I needed, he also had a bundle of Micro Engineering code 70 and 55 flextrack. The two auctions also included some miscellaneous pieces, such as used Shinohara code 70 switches and a couple lengths of Atlas code 83 flextrack. Although it's not the easiest to bend, the ME flextrack looks very nice, so it'll save me some time by using it, but I do plan to strip the rails from the Atlas track and use CVT tie strips for the mainline. When the track arrived, I laid out some pieces to mock up the track plan, and I'm pretty happy with how it's shaping up!

Subscribe to:
Posts (Atom)
